Introduction to Annotation Scale
Introduction to Annotation Scale
by
Annotation scaling was introduced first time on AutoCAD 2008. I love this feature. This feature add benefits to AutoCAD layout. There are some work around AutoCAD users do before this feature exist. But now, presenting our drawing in different scales is very easy and quick. If you are interested to learn this feature, this tutorial will be a nice reading to start.
First, what are annotations?
Annotations are every object in your drawing which is not a model or geometry. We use it to show dimensions, text as description, symbols, and pattern to show sections, materials, etc.
The problem with annotation occurs when you need to represent your drawing in different scales.

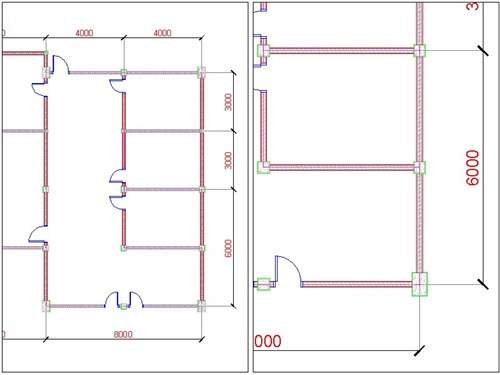
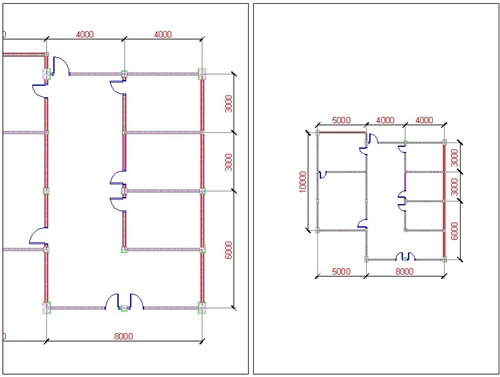
Two images above are the same model in different viewport, with different scales. If we draw the model and prepare it to a certain scale, say 1:100, when we need to represent the drawing in 1:200, the text, hatches, and all other annotations will be shown in half size to what we expected.
AutoCAD users used to create annotations in layout. But there are some downside.
- It works for text and dimension, but not for hatches.
- You may need to create more than one annotation to the same object, if you show them in different viewports. When you need to change the text content, you will have to change them all manually. Sometimes you left some of them unchanged.
- When you move the viewport, some annotations might be left behind.
Download and open this drawing. We are going to continue using the same drawing. Change your active scale from annotation scale list. It’s on your status bar. Change it to 1:100. We are going to set our drawing for 1:100 first.
Now open your dimension style. You should see a style named ’1-100 3mm’. Right click on it, and rename it to ’3 mm’. Click modify button on the right side of this dialog box.
On the FIT tab, scale for dimension features section, activate annotative.

- On the Text tab, change text height to 3, offset from dimline to 1.
- On Symbols and Arrows tab, change arrow size, center marks, and break size to 2.5.
You see all your dimension text and arrow too small? Don’t worry. We need to update them to apply the changes.

Activate update in dimension panel, annotation tab. When AutoCAD ask you to select object, just type ALL then [enter]. Now you should see your dimension correctly.
Now we are going to add another scale to these dimensions. Activate ‘automatically add scales …bla..bla..bla…’ in annotation scale group.
Change the annotation scale to 1:200. You should see the dimension size adjusted for 1:200 scale! Turn off the ‘automatically add scales…’ again. Try to change it to 1:50. What happen? Nothing.
Open your layout. Select the left viewport border, and change the scale to 1:100. Press [esc] to deselect the viewport. Select the right viewport, and change the scale to 1:200.

Compare the dimension size on those two viewport. Even the viewports have different scales, the dimension size will always be the same! When you plot this sheet, the text in all viewports will be 3mm.


Komentar
Posting Komentar